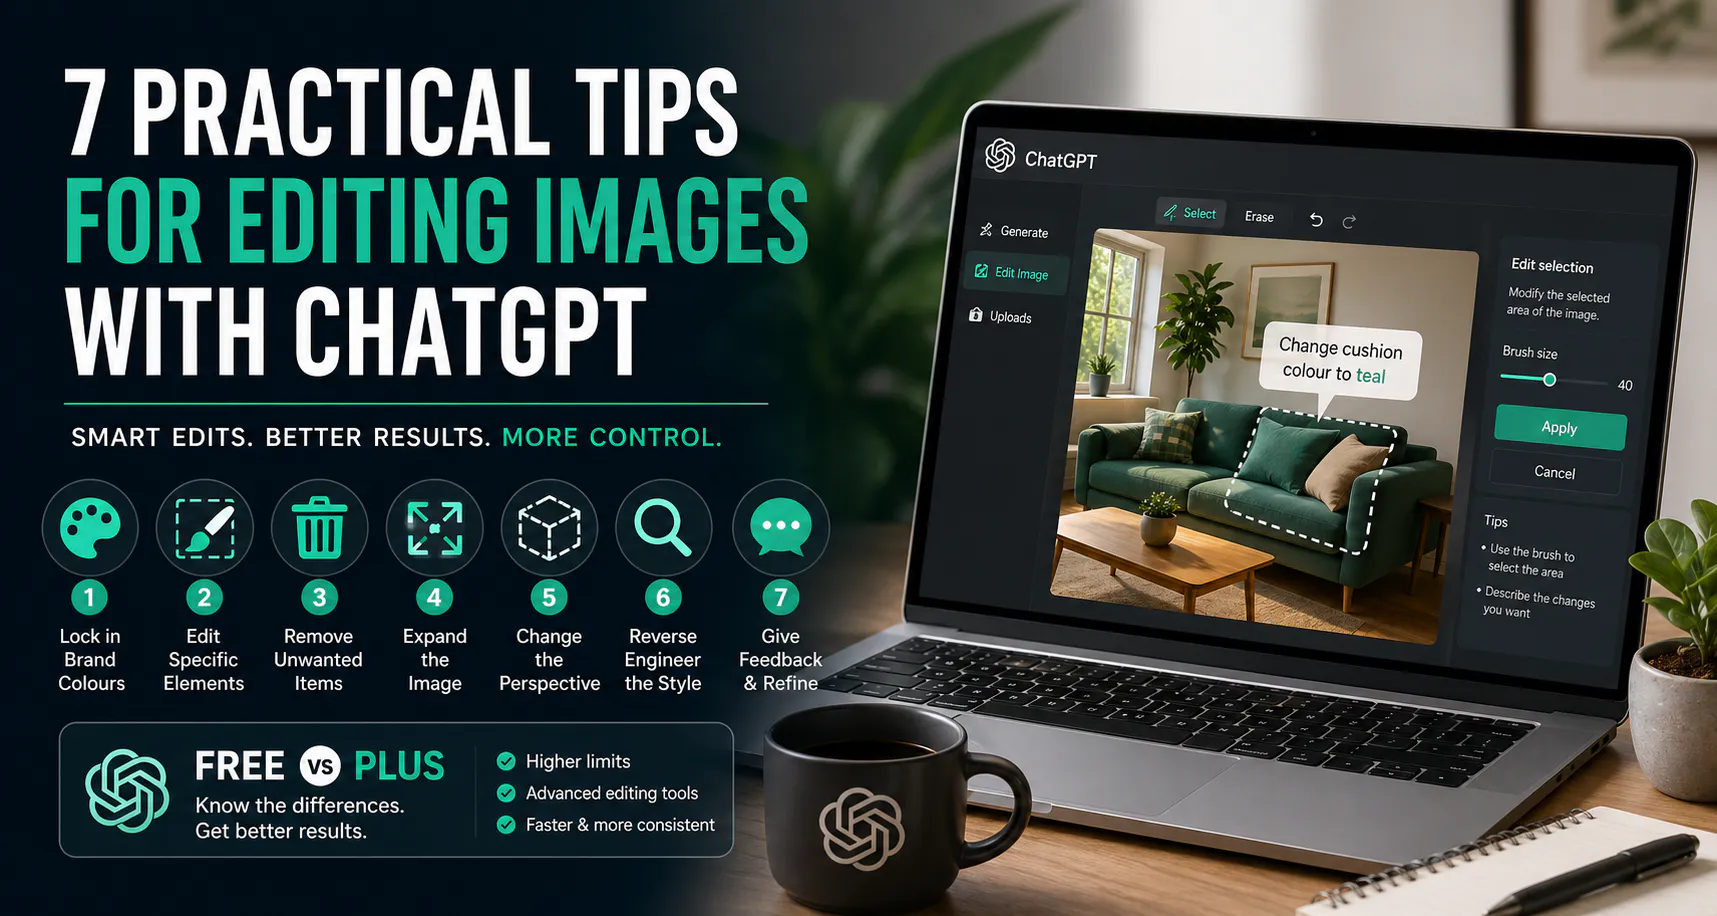
 One of the most common questions I get is how to properly edit images inside ChatGPT rather than just generating them once and starting again.
If you are using ChatGPT for image creation but not properly using the editing capabilities, you are leaving a lot on the table.
Most people treat it as a one-shot image generator.
That is not where the value is.
| Did you find this content useful? |
|---|
| Sign up for my free Marketing Hints, Tips and Hacks email newsletter every Tuesday at 11am. => Sign up here <= |
The real advantage comes from iteration. Refining, adjusting, and improving images step by step until they are usable in a real business context.
Free vs Paid ChatGPT. This Changes How Far You Can Go
As of April 2026, both Free and Plus users can generate and edit images.
But the experience is very different.
- Free plan: very limited daily images, basic editing, slower, less consistent.
- Plus plan: higher limits, faster processing, and significantly more control.
In practical terms, Free users can experiment, but Plus users can properly iterate.
That matters because most of what follows depends on being able to test, refine and improve your image several times.
If you are using this for marketing, content, or client work, the Plus plan is the realistic option.
1. Lock in Your Brand Colours from the Start
At the beginning of your conversation, tell ChatGPT your brand hex codes and instruct it to use them for all image edits.
For example:
Use these brand colours in all image edits in this conversation: #xxxxxx, #xxxxxx, #xxxxxx.
ChatGPT will then apply those colours consistently across that session.
You can also store this in ChatGPT’s memory so you do not have to repeat it every time.
For example:
Remember that my brand colours are #xxxxxx, #xxxxxx, #xxxxxx and use them when creating or editing images.
If memory is enabled, ChatGPT can retain this and apply it in future conversations.
That said, do not rely on it completely. If consistency really matters, it is still good practice to restate your colours at the start of a new project or chat.
2. Edit Specific Elements Using the Paintbrush (In-Painting) Tool
This is one of the most powerful features in ChatGPT image editing, and it is surprisingly easy to miss.
I will be honest. I completely overlooked this for a while because I did not realise it was there.
I was regenerating entire images when I only needed to change one small part. And often ChatGPT would make changes to parts of the image I was already happy with – which is really annoying.
When you generate or upload an image, click into the image and look for the edit option. This opens a paintbrush-style selection tool.
You can then highlight a specific area of the image and tell ChatGPT exactly what to change.
For example:
- Select a shirt and say, “Change this to black.”
- Select the background and say, “Make this a sunset.”
- Select an object and say, “Replace this with a laptop.”
This is called in-painting, and it gives you much more precise control.
Where to find it:
- Click on the generated image.
- Look for an Edit or Select option.
- Use the brush to highlight the area you want to change.
- Enter your instruction.
If you are not using this, you are making image editing much harder than it needs to be.
3. Remove Anything That Should Not Be There
You do not need to accept unwanted elements.
If something is in the image that should not be there, remove it. Again, using the in-painting tool to select the required parts of the image.
Examples:
- Remove the person in the background.
- Remove the logo.
- Remove the object on the table.
This is useful for cleaning up AI-generated images, reusing visuals in different contexts, and producing cleaner marketing assets.
Free users can attempt this, but results are less reliable. Plus users usually get more accurate removals because they have better tools and more room to iterate.
4. Expand, Crop and Change the Aspect Ratio
You are not limited to the original shape or framing of an image.
ChatGPT allows you to expand an image, crop it, and change the aspect ratio depending on where you want to use it.
This is essential if you are creating assets for websites, ads and social media.
Resize and Crop Images. The Quick Win Most People Miss
This is one of the simplest but most useful tricks.
You can ask ChatGPT to resize an image to an exact size and intelligently crop it so the important part stays in focus.
For example:
Resize this image to 300×300 pixels. Don’t stretch it. Crop it intelligently and keep the focus on the subject.
This works because ChatGPT understands what the key subject is and keeps it centred, rather than just chopping the image randomly.
I tested this on a head shot and it got it spot on in seconds. No Photoshop, no fiddling.
If you want a full walkthrough, I’ve covered it here:
Resize and crop your images with ChatGPT. Step-by-step
Change the Aspect Ratio
You can also reshape images for different platforms.
- Turn a square image into a landscape 16:9 banner.
- Convert an image into a vertical 9:16 format.
- Adapt an image for social media, ads or website headers.
Simply prompt:
- “Make this a 16:9 image.”
- “Convert this into a vertical 9:16 format.”
- “Make this a square 1:1 image.”
Expand the Image
If you need more space, you can extend the image beyond its original frame.
- Expand the background.
- Add more context around the subject.
- Create space for text or design elements.
This allows you to create one strong base image and adapt it across multiple uses without starting again.
5. Change the Perspective of the Same Scene
You can instruct ChatGPT to show the same scene from a different angle.
Examples:
- Show this from above.
- Show this from the side.
- Create a wider shot.
This works well for objects, environments and landscapes.
It is less reliable with people, but improving.
Free users are limited in how many variations they can test. Plus users can explore multiple options and select what works.
6. Reverse Engineer the Style of Any Image
Instead of guessing how to create a certain look, reverse engineer it.
Upload an image and ask:
Describe the prompt that would recreate this image.
ChatGPT will break it down into style, lighting, composition, colour palette and overall look.
This gives you the underlying structure behind the image.
You can then reuse and adapt that structure to create new visuals with the same style.
You can also refine it further:
- Make it more cinematic.
- Add a retro look.
- Make it cleaner and more modern.
This is how you move from random outputs to controlled creative direction.
7. Give Feedback Like You Would to a Designer
Most people either accept the result or regenerate it.
That is not how you get quality.
Treat ChatGPT like a designer and give clear, specific feedback.
Examples:
- Increase colour intensity.
- Improve contrast.
- Soften the lighting.
- Make the subject stand out more.
Small adjustments lead to significantly better outputs.
This is where the biggest gap between Free and Plus shows. Free users have limited refinements. Plus users have enough iterations to get to a strong final result.
Quality comes from refinement, not the first attempt.
Want to Go Deeper on Cropping and Resizing?
If you specifically want to resize and crop images quickly without distortion, I’ve broken that down step-by-step here:
ChatGPT trick. Resize and crop your images with AI
FAQs About ChatGPT Image Editing
Can ChatGPT crop images?
Yes. You can ask ChatGPT to crop images to specific dimensions while keeping the main subject in focus. It can intelligently centre and resize images without distortion.
Can you change aspect ratio in ChatGPT?
Yes. You can convert images into formats like 1:1, 16:9 or 9:16 using simple prompts or the built-in editing tools.
Do you need ChatGPT Plus for image editing?
No, but the Free plan has limits. ChatGPT Plus allows faster editing, more iterations and better control over image refinements.
Can ChatGPT edit parts of an image?
Yes. Using the paintbrush selection tool, you can highlight specific areas and tell ChatGPT exactly what to change.
Final Thoughts
The difference between average and high-quality AI images is not the initial prompt.
It is the refinement process.
And more importantly, how many times you can iterate.
That is why the Free vs Paid distinction matters.
- Free: suitable for testing and experimentation.
- Plus: required for consistent, high-quality output.
If you use ChatGPT as a refinement tool rather than a generator, you will get stronger branding, more consistent visuals, better quality assets and less time wasted starting again.
Most businesses are still using this at a basic level.
Those who learn how to control and refine outputs will have a clear advantage.
If you are interested in using AI tools within HighLevel (the #1 CRM & Marketing automation platform join us on our next MarketerM8 AI Employee Workshop where we cover marketing automation, AI and real-world implementation.
Written by Julian Mills – HighLevel consultant and marketing strategist. About Julian Mills.

